I create a few how-to and step by step manuals for my users at work which include multiple screen shots. I do this using OpenOffice which has a handy export to PDF feature.
However when trying to insert screen shots into a document it becomes very laborious to do three clicks (Insert ==> Picture ==> From File…) to get to the file chooser dialog.
Adding the “From File…” button to your Standard Toolbar reduces your clicks by 2.
Heres how:
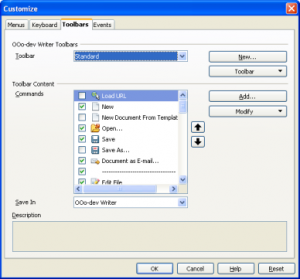
In OpenOffice click Tools ==> Customize… and select the Toolbars tab and the Standard Toolbar from the Toolbar Drop down list as shown.

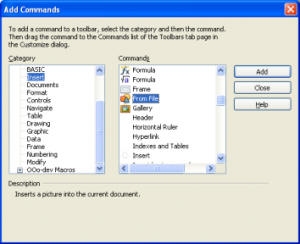
Click the Add… button and then Select “Insert” from the Category pane and “From File” from the Command Pane. Then click Add

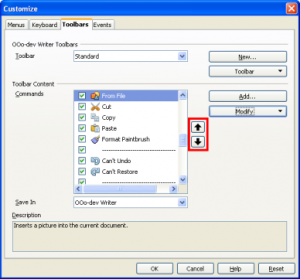
Use the up and down buttons to move the Icon to where you want it to appear on the standard toolbar. I chose the Cut Copy Paste section.

Click OK on the Customize dialog and you are done.
You should now have a “From File” icon on your Standard Toolbar as shown.

0 Comments