
This is how to get a HP printer to authenticate via a self signed certificate with Office 365 certificate authenticated connector.
Why?
The self-signed certificates created by the printer have a common name based on the Host Name so if the printer host name is printer-01 the cert will have that as its CN but to authenticate with Microsoft 365 it needs to have the hostname and a fully qualified domain name matching your M365 tenants verified domain name. For example printer-01.toggen.com.au
Get your Microsoft 365 mail server
dig mx toggen.com.au +short
10 toggen-com-au.mail.protection.outlook.com.
Create a Certificate Signing Request
On the printer
Goto Advanced Settings => Certificates => Configure
Create a Cerficate Request (CSR)
Make sure the Common Name domain part matches your Microsoft 365 verified domain
printer-01.toggen.com.au
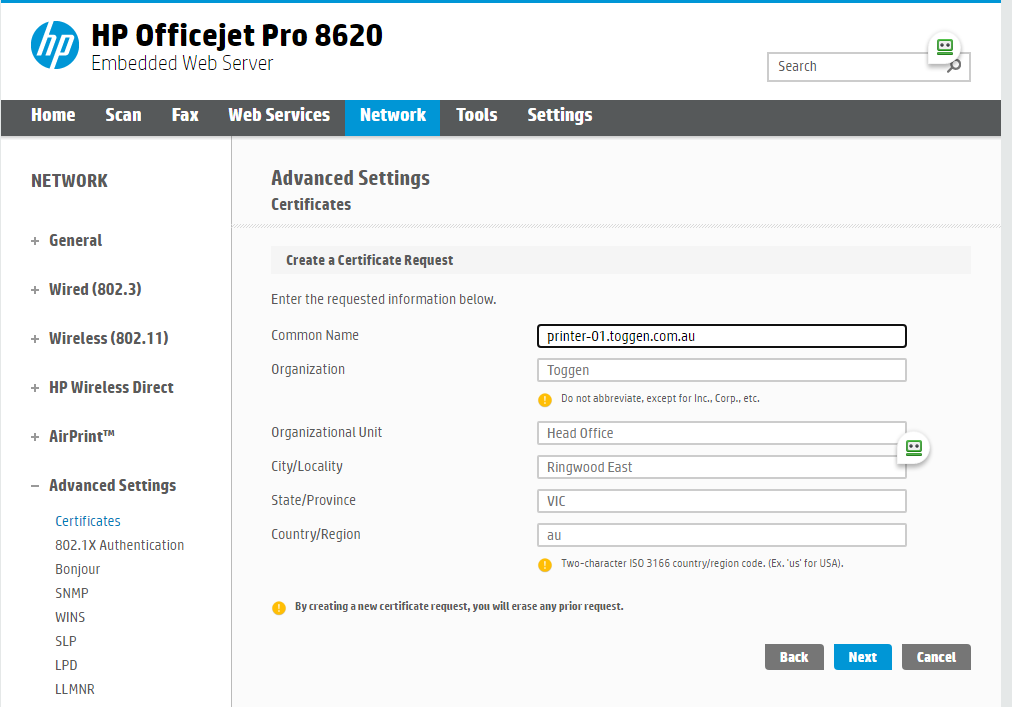
Complete the wizard this will output a CertRequest.pem file download it to somewhere you can run openssl commands
Create a self signed cert from the Printer CSR
openssl genrsa -des3 -passout pass:abcxyz -out keypair.key 2048
openssl rsa -passin pass:abcxyz -in keypair.key -out priv.key
openssl x509 -req -days 1825 -in CertRequest.pem -signkey priv.key -out printer.cert
openssl pkcs12 -export -out printer.pfx -inkey priv.key -in printer.crt
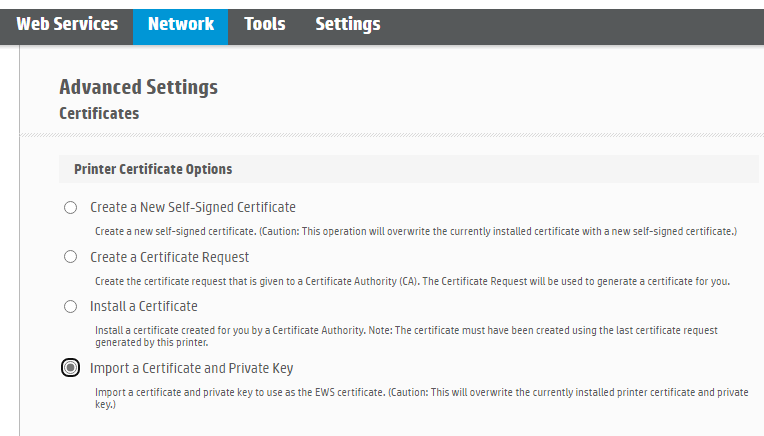
Import the Certificate into the Printer
Grab the pfx file and import it into the printer certificats
In Microsoft 365 create a certificate authenticated connector
Go to the Exchange Admin Center https://admin.exchange.microsoft.com/ login as a Global Admin
Choose Mail flow => Connectors
Add a connector
Choose from "Your organisation's email server" to "Office 365" as the mail flow scenario
Give it a name, accept the defaults
Under Authenticating sent email select "By verifying that the subject name on the certificate that the sending server uses to authenticate with Office 365 matches the domain entered in the text box below (recommended)" and enter
printer-01.toggen.com.au
You can enter a wildcard of *.toggen.com.au but then anyone can create a [email protected] cert and send through your gateway so give the exact CN (subject name) from the certificate
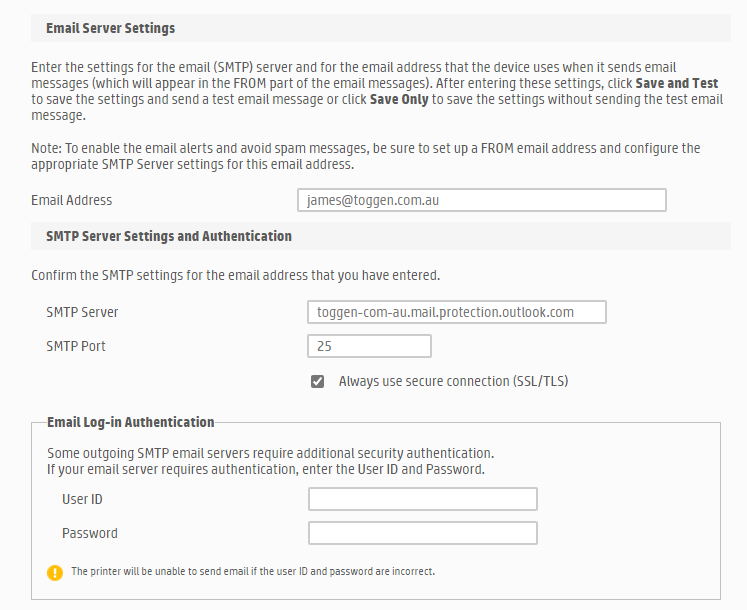
On the Printer configure the Email Server Settings
You have to do this in two areas under Email Alerts and Scan to email
References
https://www.ssl.com/how-to/create-a-pfx-p12-certificate-file-using-openssl/
https://www.rosehosting.com/blog/how-to-generate-a-self-signed-ssl-certificate-on-linux/
0 Comments