- Boot an XP VM with a working controller and the right Virtual Hardware
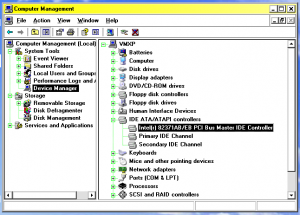
- Open Device Manager and expand the IDE ATA/ATAPI Controllers
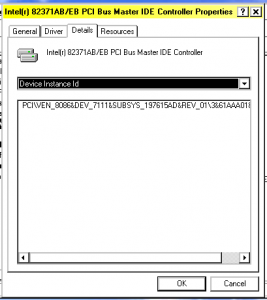
- Choose the Controller and then go in and view the properties
- Make a note of the PCI\Vend string. In this case it's VEN_8086&DEV_7111
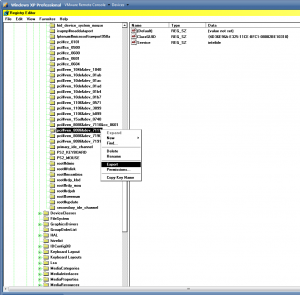
- Open registry editor and navigate to HKEY_LOCAL_MACHINE\SYSTEM\CurrentControlSet\Control\CriticalDeviceDatabase and locate the PCI#VEN_8086&DEV_711 key and export it to a text file. Make note of the service name in this case it is "intelide"
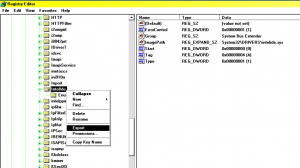
- Navigate to HKEY_LOCAL_MACHINE\SYSTEM\CurrentControlSet\Services\[insert_controller_service_name_here] which in my case is HKEY_LOCAL_MACHINE\SYSTEM\CurrentControlSet\Services\IntelIde and export this key too
- Shutdown the working VM and attach the Non-booting Ghost restored image vmdk and reboot
- The disk should appear as an additional hard disk - you may need to go into disk management and give it a drive letter in my case this was F:
- Copy the driver file as listed in ImagePath of the regfile mentioned above from the C:\windows\system32\drivers\ folder to the drive and path of the Ghost image which should be something like F:\Windows\system32\drivers. I have found that the driver file generally exists on the target machine , in that case I skip the copy
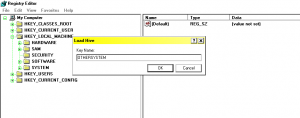
- Run regedit again and mount the SYSTEM image of the Ghost Restored Imaged into the HKLM tree. To do this select the HKEY_LOCAL_MACHINE key click File ==> Load Hive... and navigate to F:\Windows\system32\config and open the SYSTEM file (not SYSTEM.sav or SYSTEM.log). You will be prompted for the name of a temporary registry key to mount it under I chose OTHERSYSTEM
- Once you have loaded the SYSTEM HIVE of the non-booting ghost restored image. You then can access the values you need under the name you chose above i.e. HKEY_LOCAL_MACHINE\OTHERSYSTEM
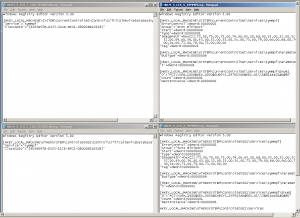
- Using Notepad.exe edit the reg files you exported to make them inject the data into the right spot in the Loaded SYSTEM HIVE basically you need to change all references to HKEY_LOCAL_MACHINE\SYSTEM to HKEY_LOCAL_MACHINE\OTHERSYSTEM and the Loaded hive doesn't have CurrentControlSet this needs to be change to ControlSet001
- Import the edited registry files this should insert the required data for the non-booting image to find the VMWare controller and boot
- Shut down the Working VM detach the Ghost Image VMDK from the working VM and then boot the non-booting VM. With the correct controller it should boot.
- You will probably be prompted to Re-Activate windows when the Image boots and you won't be able to log in before you do this

You sir are a God!
Thank You very much for posting such a useful guide! Saved me from so much work! Thank You very much!
Respect! o/
Ingenious idea, James. Saved me quite some trouble.
For future passers-by, if your virtual hard disk is of SCSI type, you might be interested in SCSI and RAID controllers, in my case:
- VMware VMSCSI Controller (VEN_104B&DEV_1040)
- vmscsi service
- vmscsi.sys driver
One other note, be sure to correctly rename all registry key names from CurrentControlSet to ControlSetXXX, I forgot to rename one and got STOP 0x67 config_initialization_failed screen.
Thanks a lot. Works perfect with Windows XP SP3
THX THX THX