
Enabling and Disabling a SINGLE Fixed IPv6 Address ON WINDOWS 11
Do you have an account with a provider that sends an email to you to approve every connection from new IP addresses?
Is that provider using IPv6 for their website?
Are you IPv6 enabled?
Does your IPv6 address change every time your boot your computer?
Do you want a shorter IPv6 Address?
If you answer yes to any of these questions then you may wish to make your IPv6 address fixed.
Please note: It is a nice feature of IPv6 that people can't guess your IP because you receive a random IPv6 and temporary address often. So giving yourself a fixed IPv6 address might reduce your privacy/security. Make sure you have a stateful firewall denying new inbound traffic to your computer before giving yourself a fixed IPv6 address.
me - 2024
Enabling a fixed IPv6 Address
This is how to give your computer a single fixed IPv6 Address.
In an elevated (Administrator) Powershell prompt.
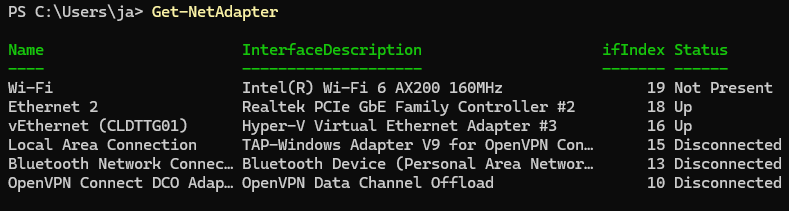
First get the name of the adaptor you are using for internet access.
Get-NetAdapter
Get the current IPv6 address of your Ethernet or WiFi Interface (which ever connects to the internet)
Get-NetIPAddress -InterfaceAlias "Ethernet 2" | findstr /i IPAddress
Output
IPAddress         : fe80::4753:d2g6:7079:ecaa%18
IPAddress         : 2506:3500:35f:25d0:d1d4:af7:1eea:ea93
IPAddress         : 2506:3500:35f:25d0:51fe:7d5:3cb7:7980
IPAddress         : 10.71.19.19
Discerning WHAT your fixed IPv6 Address for a slash 64 network WILL BE
Identify the network portion of your IPv6
Each block of numbers in an IPv6 address which are separated by a colon (:) represents 16 bits of the subnet
Typically you will have a /64 network so the network portion will be 4 blocks by 16 = 64
My ISP Exetel delegates to me a /60 IPv6 network. My Unifi Router then uses 4 bits for subnetting and puts my clients into /64 subnets. So my 64 bit network portion of the IP address is
2506:3500:35f:25d0
The Unifi router takes host number 1:
2506:3500:35f:25d0::1/64
So I can assign myself host number 2:
2506:3500:35f:25d0::2/64
Viewing the IPv6 ROUTER IP Address from Unifi and Subnet Mask
Login to your Unifi UDR/UDM and run ip add show once you know the interface name you
ip add show | more
# then once you identify the interface
ip add show dev br3

46: br3: <BROADCAST,MULTICAST,UP,LOWER_UP> mtu 1500 qdisc noqueue state UP group default qlen 1000
    link/ether f4:92:bf:84:20:1c brd ff:ff:ff:ff:ff:ff
    inet 10.71.19.1/24 scope global br3
       valid_lft forever preferred_lft forever
    inet6 2506:3500:35f:25d0::1/64 scope global dynamic
       valid_lft 546668sec preferred_lft 546668sec
    inet6 fe80::f692:bffe:fd84:301c/64 scope link
       valid_lft forever preferred_lft forever
What an IPv6 looks like if you write it out long hand
The IPv6 address 2506:3500:35f:25d::2 written long hand is
2506:3500:035f:025d:0000:0000:0000:0002
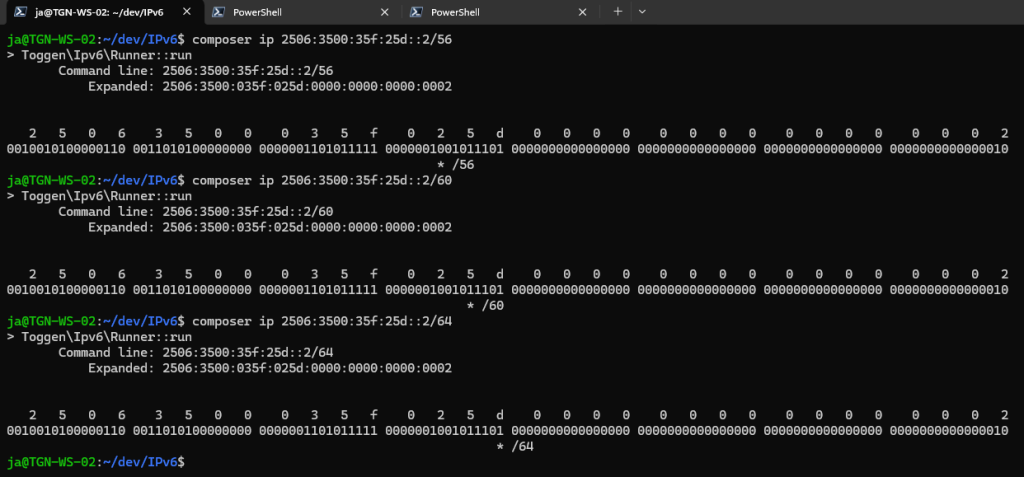
I Wrote an PHP Application to visualize IPv6 addresses and subnet masking IN Hex and Binary
https://github.com/toggenation/IPv6
The above PHP project allows me to enter an IPv6 address and then see where the subnet mask comes to.
This way I can visually discern where the network bits ends and the host bits part begins.
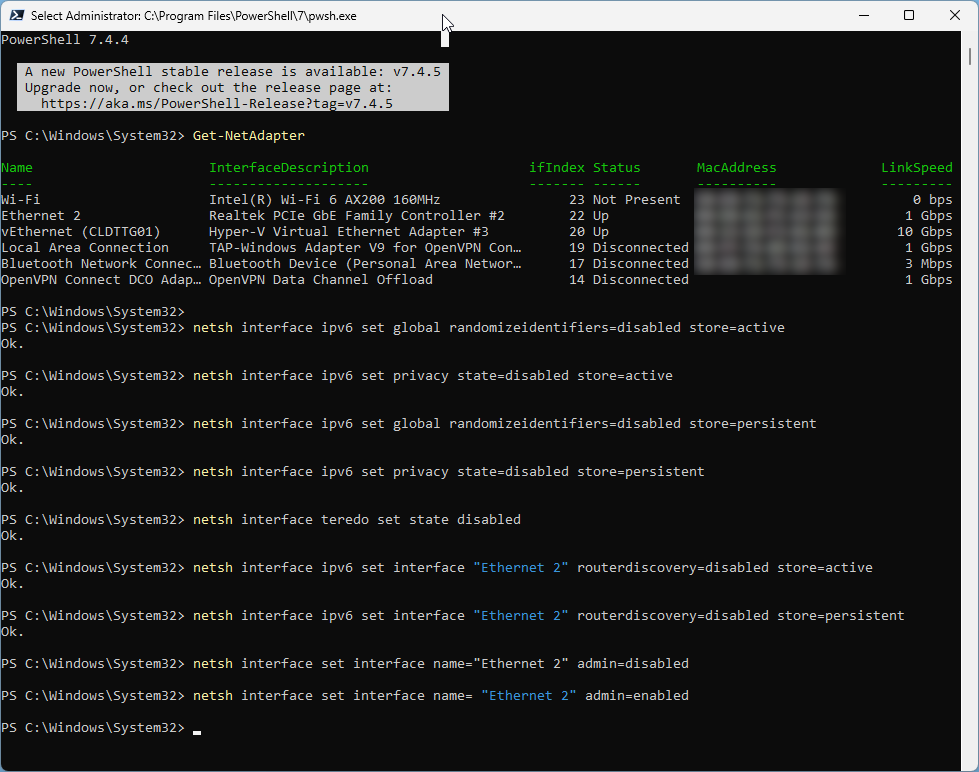
Disabling Dynamically Assigned MULTIPLE IPv6 Addresses on Windows 10/11
These commands stop your workstation from getting dynamically assigned IPv6 addresses. See below for the command to reverse this if needed
The last two commands disable and re-enable the interface so you don't have to reboot
netsh interface ipv6 set global randomizeidentifiers=disabled store=active
netsh interface ipv6 set privacy state=disabled store=active
netsh interface ipv6 set global randomizeidentifiers=disabled store=persistent
netsh interface ipv6 set privacy state=disabled store=persistent
netsh interface teredo set state disabled
netsh interface ipv6 set interface "Ethernet 2" routerdiscovery=disabled store=active
netsh interface ipv6 set interface "Ethernet 2" routerdiscovery=disabled store=persistent
netsh interface set interface name="Ethernet 2" admin=disabled
netsh interface set interface name= "Ethernet 2" admin=enabled
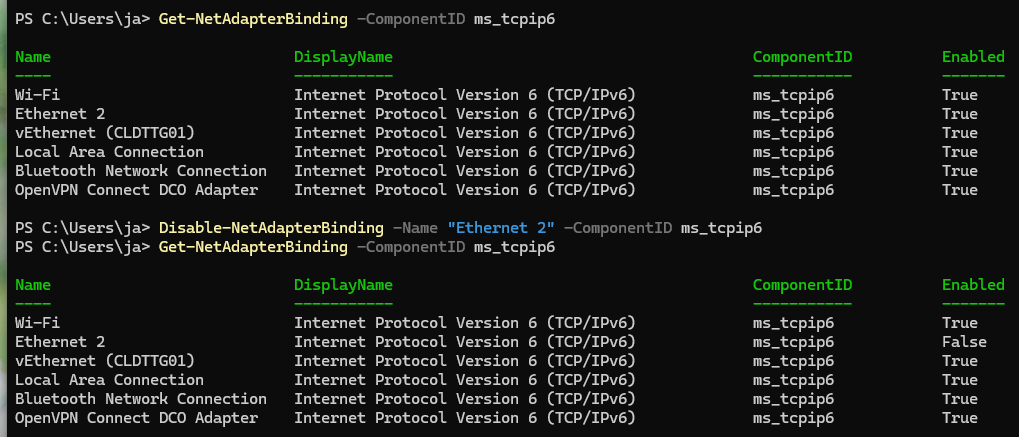
This is a screen shot of what the above command being run look like
Configuring a SINGLE fixed IPv6 Address
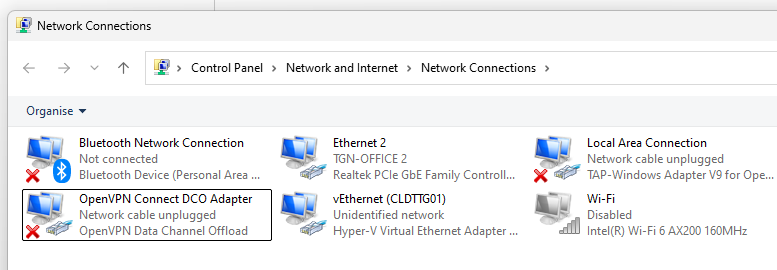
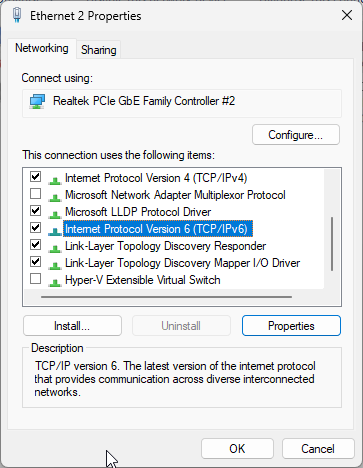
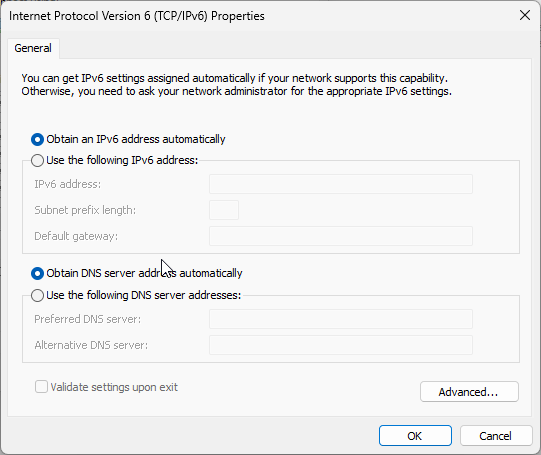
You can do this from the Windows 11 interface (Settings => Network & internet => Ethernet => etc) but I'm old school so I use Control Panel
Go into Control Panel => Network and Internet => Network and Sharing Centre => Change Adaptor Settings and open the Properties dialog of your connection (Ethernet 2)
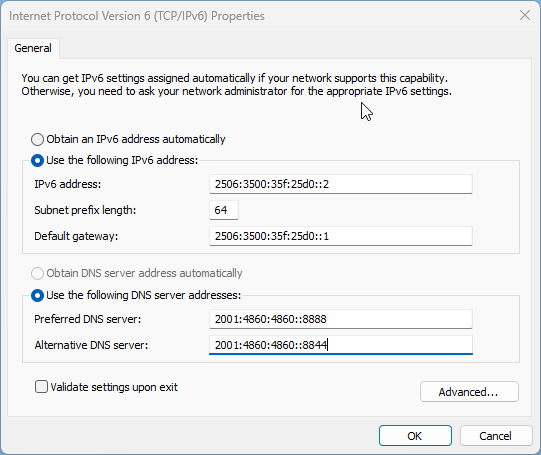
Edit the properties of the IPv6 settings
Add you fixed IPv6 Address and preferred IPv6 DNS (Here I'm using Google DNS but you may want to just use your Router IP (Default gateway) if that is configured to give DNS services to your clients)

Disabling/Enabling IPv6 Instead of doing all of the above
So if like me you add a static IPv6 address then decided it was just easier to turn off IPv6 when you access the IP restricted portals by using your already approved fixed IPv4 IP external / publich address here is a script that toggles IPv6 on or off for your adapter
# This script Toggles IPv6 support On or Off
# Identify the adapter you want to do it to with Get-NetAdapter.
# Then populate the $adapter variable with the name of it
# Self-elevate the script if required
if (-Not ([Security.Principal.WindowsPrincipal] [Security.Principal.WindowsIdentity]::GetCurrent()).IsInRole([Security.Principal.WindowsBuiltInRole] 'Administrator')) {
    if ([int](Get-CimInstance -Class Win32_OperatingSystem | Select-Object -ExpandProperty BuildNumber) -ge 6000) {
        $CommandLine = "-File `"" + $MyInvocation.MyCommand.Path + "`" " + $MyInvocation.UnboundArguments
        Start-Process -FilePath PowerShell.exe -Verb Runas -ArgumentList $CommandLine
        Exit
    }
}

$adapter = "Ethernet 2"

$enabled = (Get-NetAdapterBinding -ComponentID ms_tcpip6 -Name $adapter).Enabled

if ($enabled) {
    Write-Host "Disabling IPv6 on Ethernet 2"
    Disable-NetAdapterBinding -Name $adapter -ComponentID ms_tcpip6
}
else {
    Write-Host "Enabling IPv6 on Ethernet 2"
    Enable-NetAdapterBinding -Name $adapter -ComponentID ms_tcpip6
}

Get-NetAdapterBinding -ComponentID ms_tcpip6 -Name $adapter

$sleep = 5
Write-Host "`n`n"
Write-Host Sleeping $sleep

Start-Sleep -Seconds $sleep
Manual commands
Get-NetAdapterBinding -ComponentID ms_tcpip6
Disable-NetAdapterBinding -Name "Ethernet 2" -ComponentID ms_tcpip6
Enable-NetAdapterBinding -Name "Ethernet 2" -ComponentID ms_tcpip6
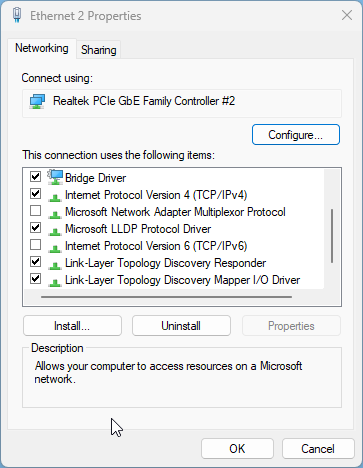
Of course you can simply uncheck Internet Protocol Version 6 (TCP/IPv6) in the Adaptor Properties too.
Disabling A Statically AssigED Single IPv6 Address
To reverse the addition of a single static IPv6 Address do the following
Run these commands which enable dynamic IPv6 addresses again
netsh interface ipv6 set global randomizeidentifiers=enabled store=active
netsh interface ipv6 set privacy state=enabled store=active
netsh interface ipv6 set global randomizeidentifiers=enabled store=persistent
netsh interface ipv6 set privacy state=enabled store=persistent
netsh interface teredo set state enabled
netsh interface ipv6 set interface "Ethernet 2" routerdiscovery=enabled store=active
netsh interface ipv6 set interface "Ethernet 2" routerdiscovery=enabled store=persistent
netsh interface set interface name="Ethernet 2" admin=disabled
netsh interface set interface name= "Ethernet 2" admin=enabled
Check to make sure your multiple IPv6 Addresses are back
GEt-NetIPAddress -InterfaceAlias "Ethernet 2" | findstr /i ipad
IPAddress         : fe80::4753:d2g6:7079:ecaa%18
IPAddress         : 2506:3500:35f:25d0:d1d4:af7:1eea:ea93
IPAddress         : 2506:3500:35f:25d0:51fe:7d5:3cb7:7980
IPAddress         : 10.71.19.19
0 Comments