
Trying to configure a heap of legacy user shared mailboxes to
- Be hidden from the Global Address List
- Not allow external senders to send to
- Remove the internet email addresses and go back to [email protected] so that it is obvious these have been decommisioned in lists
- Remove extra proxy addresses (email aliases)
You may get error messages in the Exchange and admin.microsoft.com portals when trying to modify attributes from user being synched to an on-prem AD domain. For example hiding a user from the Global Address List or changing their email aliases
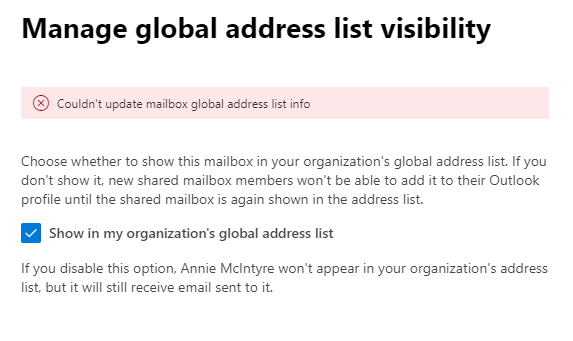
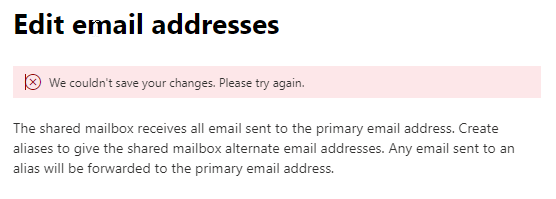
The reason for this is these attributes need to be edited in Active Directory Users and Computers and then pushed to Azure AD
On the Domain Controller that hosts your AD Sync service open ADU&C and Synchronization Service (to view the result from running Start-ADSyncSyncCycle -PolicyType Delta
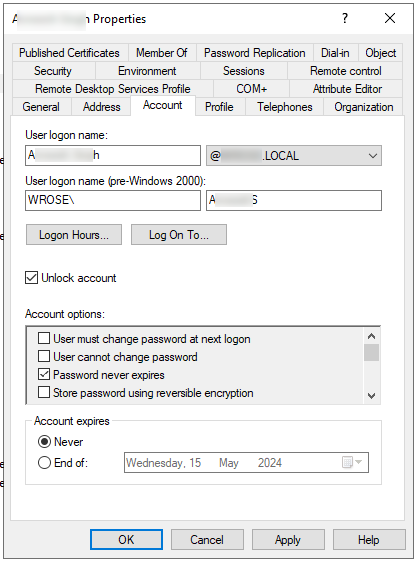
Step 1
Unlink the user from the online domain by changing the User logon name @ back to the local domain name. e.g. if the User logon name was [email protected] it becomes [email protected] or whatever your internal AD domain is
Note: In this screen shot I accidentally checked "Unlock account" leave this alone unless you do want to unlock the account.
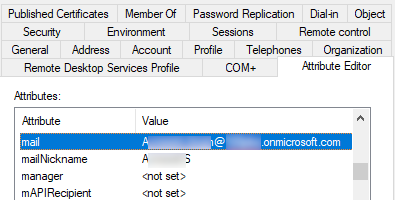
Step 2
In the attribue editor change the mail attribute back to the default tenant.onmicrosoft.com format
e.g. [email protected] becomes [email protected]
Also make sure the mailNickname is not blank you might need to put something unique to your tenant in there such as firstnameIntial jamesM (check the other M365 users for ideas for something similar you can put in nickName)
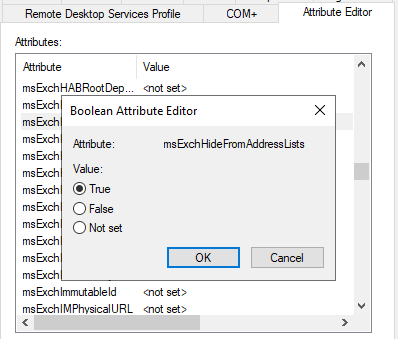
Step 3 - Set the attribut to hide the sharedMailbox from the Global Address List
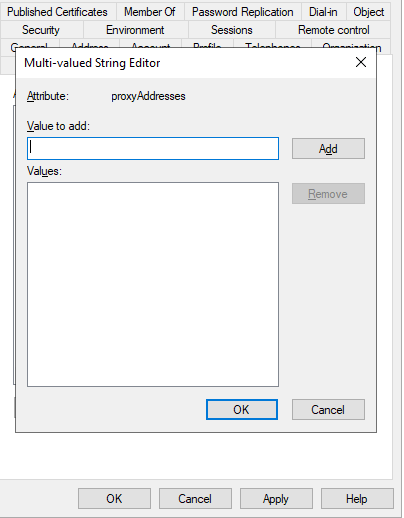
Step 4 - Remove any pesky email aliases
You don't have to make this blank but you can add and remove the email aliases here
SMTP: [email protected]
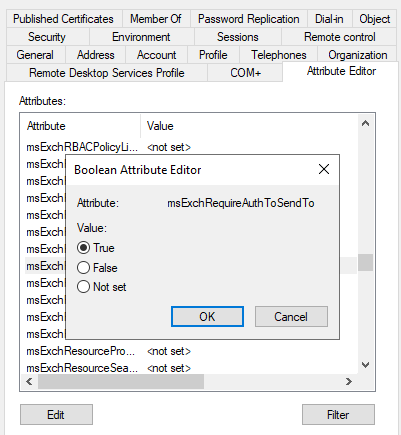
Step 5 - Bounce external emails by making sure everyone that sends to this mailbox has to auth by setting the msExchRequireAuthToSendTo attribut to TRUE
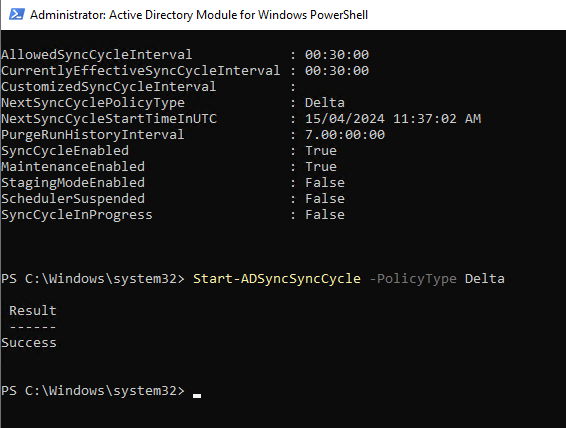
Step 6 - Trigger a sync using PowerShell
Start-ADSyncSyncCycle -PolicyType Delta
Use Get-ADSyncScheduler to see the schedule and other settings as in the following screen shot
0 Comments